Install Ethernet driver on FreeNAS/NAS4Free (embedded)
FreeNAS supports the appropriate hardware of the FreeBSD-Version where FreeNAS is based on. But sometimes it is necessary to install a third-party or a self-compiled driver. My how-to “Install Ethernet driver on FreeNAS/NAS4Free (full-install)” shows how to install a downloaded binary Ethernet interface (NIC) driver on a full installation of FreeNAS/NAS4Free. This how-to describes the same for the embedded platform. It was written for non-experienced Unix users.
Requirements
- Monitor
- Keyboard
- USB flash drive, Fat32-formatted (to store the driver file temporarily)
- FreeNAS has to be installed as “embedded”. If you have installed FreeNAS/NAS4Free as “Full OS on HDD + DATA + SWAP Partition” see the how-to “Install Ethernet driver on FreeNAS/NAS4Free (full-install)” for details.
- Binary driver file (*.ko) for the appropriate FreeBSD-Version on which your FreeNAS is based on.
- Computer/Tablet/etc. with web browser that is connected to same network as the server (to access the web administration of FreeNAS/NAS4Free).
Install Driver
This how-to shows how to install a available binary driver for the NICs RTL8111B, RTL8168B, RTL8111, RTL8168, RTL8111C, RTL8111CP, RTL8111D(L), RTL8168C, RTL8111DP, RTL8111E on FreeNAS 0.6x or 0.7x.
- Download or compile the appropriate driver.
For the NICs mentioned above volunteers compiled and published drivers . Refer the download section for details. Please note the different writing for the different driver filenames
if_rl...andif_re...in the instructions #8, #14 and #16! - Copy the file to your flash drive. Take care that the drive was formatted with the Fat32 filesystem. That is in almost all cases the default filesystem on flash drives, so that you do not need to do anything in general.
- Connect the monitor and keyboard to your FreeNAS server.
-
Start your server and choose option 6 (Shell) in the console setup:
-
Connect your flash drive to the server.
- The command
dmesg | tail
shows the name of the flash drive device, e.g.
da2(see screenshot below).
Output: dmesg | tail
-
Make a directory “usb” in “/mnt” and mount your flash drive:
mkdir /mnt/usb
mount_msdosfs /dev/da2s1 /mnt/usb
The suffix
s1afterda2means the first slice on the deviceda2(here: USB flash drive). Read more about mounting in the FreeBSD manual – chapter 3. -
Load the driver temporarily first:
kldload /mnt/usb/if_rl.ko
If your system throws an error as “file exists” you may have a newer FreeNAS/NAS4Free version installed. It is likely that a already installed kernel module of the same name interferes with yours.
As far as I know it is impossible to overwrite this driver on an embedded installation of FreeNAS/NAS4Free. Because the driver in question is loaded at every boot time from the operating system image again. A workaround is the full installation of FreeNAS/NAS4Free only. Refer my how-to Install Ethernet driver on FreeNAS/NAS4Free (full-install). - Quit the shell by typing exit.
- Back in the main menu type 1 for “Assign interface and select your interface” and then choose the appropriate adapter (rl0) and follow the wizzard.

Console Setup
- When you are back to the main menu type 2 for “Set LAN IP address” and enter the IP-address of your FreeNAS/NAS4Free server, e.g.
192.168.111.250. The address must fit to your network. - Again back to the main menu choose option 6 to start a shell.
- Be sure that you have already setup a share on your server (Got to the web administration, eg.
http://192.168.111.250to do the job). If you do not know how to do this, refer the documentation of FreeNAS/NAS4Free for details. Lets say that your share is in /mnt/network. - Copy the driver to the share. I recommend to copy it in a seperate directory (folder), e.g. “system“. If your share is in /mnt/network:
mkdir /mnt/network/system
cp /mnt/usb/if_rl.ko /mnt/network/system/
- Open a web browser on a separate computer/tablet/etc. and open the web administration.
- In order to start the driver automatically go to “System|Advanced|Command scripts” add a new script and fill in e.g.
kldload /mnt/netzwerk/system/if_re.koin the field “Command” and “PostInit” in “Type”. Click “Save” and close the web administration. - Back to your server’s main menu, reboot it by choosing option 7. The driver should be loaded automatically after reboot.
Console Setup


Download
Below you find some ready-to-use (binary) drivers (for NICs with RTL8111B, RTL8168B, RTL8111, RTL8168, RTL8111C, RTL8111CP, RTL8111D(L), RTL8168C, RTL8111DP, RTL8111E), some volunteers thankworthy provided for a couple FreeNAS versions.
[TABLE=5]
Related Links
- Unix driver (source code) for RTL81xxxx – Realtek Homepage
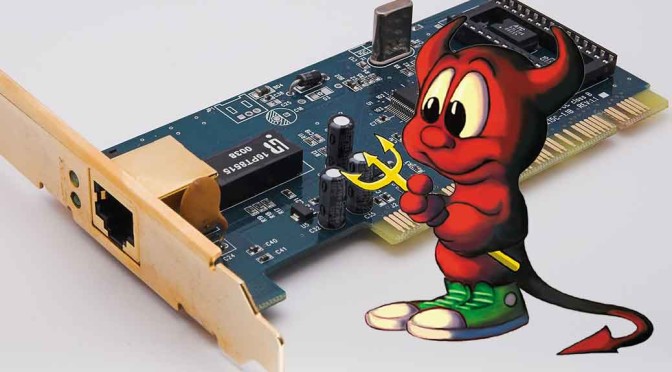
Titleimage:
BSD Daemon by
Diavolo Qqta (CC BY-NC-SA 2.0)
„Ethernet NIC 100Mbit PCI“ by afrank99. CC BY-SA 2.0 via Wikimedia Commons.
I cannot download the FreeNAS 0.7.2 (FreeBSD 7.3) 32-bit https://files.me.com/twoslick/12js1a
Hello Felix, Thank you for your note. I appreciate it. This file you are looking for was provided by Tim Rupe and he deleted it obviously.
However I am hosting the file now. Please go to https://blog.hani-ibrahim.de/wp-content/uploads/Realtek_RTL8111F_FreeNAS7-x86.zip.
I also updated the link in the download table, Hani
I’ve found driver for my NIC, but I’ve got to compile them first but I’m running only on windows, is there a way to do so on windows
Dear Jo, To be brief, it is not possible to compile a driver for FreeNAS/NAS4Free on Windows natively.
You need a FreeBSD installation on a (virtual) machine to compile the driver yourself. An you need the appropriate version and architecture which fits to your FreeNAS/NAS4Free version. But be advised that is not that easy unfortunately.
Doesn’t fit the drivers provided on this page to your FreeNAS/NAS4Free version?
Hallo,
Deine Tutorials sind klasse!!!! Gerade für mich als Nas4Free-Neuling 🙂
Habe mir jetzt den aktuellen Treiber für meine neue INTEL PRO 1000GT-Netzwerkarte gezogen und möchte diesen Treiber gern in die Embedded-Version einfügen. Leider habe ich NULL Ahnung, wie ich das machen soll, weil der Treiber nur als .tar.gz-File vorliegt.
Kann Jemand helfen??????
Hallo Peter, das ist leider nicht so leicht. Das tar.gz-File ist ein unter UNIX übliches Archivformat, wie ZIP unter Windows. Es enthält in deinem Fall den Quellcode des Treibers. Du müsstest nach dem Entpacken den Quellcode des Treibers unter FreeBSD in der passenden Architektur (32- oder 64-bit) und der zur NAS4Free passenden FreeBSD-Version kompilieren oder kompilieren lassen. Dann, gemäß meiner Anleitung installieren. Ersteres ist leider eine große Hürde, da du eine passende FreeBSD-Installation benötigst.
Manchmal ist es viel einfacher eine von NAS4Free unterstützte Netzwerkkarte einzubauen.
Hallo Hani,
ohjeeeee … das liest sich zu kompliziert 🙁 Kein Wunder, dass sich Linux niemals auf breiter Front durchsetzen wird. Das ist teilweise einfach zu kryptisch und verworren 🙁
Danke für Deinen Hinweis!!!
Hi,
leider habe ich auch ein recht neues Mainboard (Asus H87i-Plus), welches anscheinend bisher nicht unterstützt wird von F4N.
Da ich dort einen Intel Treiber benötigen würde habe ich wohl auch keine Chance den Umweg über eine externe Netzwerkkarte zu vermeiden oder?
Gruß
Das halte ich auch für das Sinnvollste, wenn du keinen passenden (kompilierten) Treiber beschaffen kannst.
Hallo,
ich versuche gerade den Treiber zu installieren. Allerdings kann ich den Treiber nicht temporär laden 🙂
kldload /mnt/usb/if_rl.ko –> no such file or directory
Die .ko-Datei ist natürlich auf dem Stick vorhanden! Allerdings fehlt bei mir bei der dmesg-Augabe der GEOM-Hinweis “Label of provider ” ….
Tipp???
Hallo Markus, hat denn das Mounten mittels “mount_msdosfs …” (Punkt 7) geklappt?
Gebe mal folgendes in die Shell ein:
cd /mnt

ls -la
Wird da das Verzeichnis “usb” aufgelistet? Wenn nicht, ist der USB_Stick nicht eingehängt (gemountet). Das lässt sich auch letztendlich aus der Fehlermeldung: “no such file or directory” schließen.
Lautet dein Gerätename in der “dmesg|tail”-Ausgabe auch “da2” oder anders? Dementsprechend musst du den mount-Befehl anpassen. Ist der Gerätename “da4” muss er:
mount_msdosfs /dev/da4s1 /mnt/usblauten.
Wenn bis dahin soweit alles korrekt war kopiere den Treiben am besten auf einen anderen Stick und starte den Server neu. Versuche dann noch mal den Stick zu mounten. Unter “/mnt” muss sich dann in Verzeichnis “usb” befinden, wenn du nach meiner Anleitung vorgehst.
Hallo Hani,
erst einmal vielen Dank, dass Du Dir am 1. Weihnachtstag die Zeit nimmst zu antworten 🙂
Ich habe nun 3 verschiedene FAT32-Sticks ausprobiert, auf dem sich die Dateien if_re.ko und if_rl.ko befinden … bei keinem Stick kommt nach dem DMESG-Befehl der “GEOM Label”-Hinweis “msdosfs USB Disk”
Die Sticks werden immer als da1 angezeigt.
“mount_msdosfs /dev/da1 /mnt” führt dazu, dass die beiden .ko-Dateien unter /mnt liegen … UND meine vorhandenen Einhängepunkt ZFS und Snapshot verschwunden sind :-((((
Es ist zum Verzweifeln!!!
Markus, das sieht bis hierhin erst mal ganz gut aus. Dein Stick ist gemountet, nur an der falschen Stelle. Die Treiber müssen sich in einem Unterordner befinden und nicht direkt unter “/mnt”, sonst überschreibt es die Mountpoints deiner Freigaben, wie es bei dir jetzt geschehen ist. Ich glaube ich habe einen Zwischenschritt nicht beschrieben (Habe das How-To korrigiert).
Gehe folgendermaßen vor:
Nach einem frischen Neustart, erzeuge zuerst ein Verzeichnis “usb” unter “/mnt” mit
mkdir /mnt/usbJetzt mountest du den USB-Stick darin mit:
mount_msdosfs /dev/da1s1 /mnt/usbDie Treiber-Dateien (*.ko) müssen sich jetzt im Unterverzeichnis “/mnt/usb” befinden. Dann sollten auch deine Freigaben noch da sein. Lade den Treiber temporär mit
kldload /mnt/usb/if_rl.kound folge der Anleitung weiter. Ich hoffe, dass es jetzt funktioniert.
PS: GEOM-Label ist hier nicht so wichtig. FYI: http://www.freebsd.org/doc/de/books/handbook/geom-glabel.html
Hi Hani,
Du bist klasse 🙂 … aber leider funktioniert auch das nicht 🙁
Der kldload-Befehl führt zur Ausgabe diverser Fehlermeldung … “modul register: rl/miibus already exist” … Modul rl/miibus: failed to register 17 … dann folgen noch ein paar “Register 17”-Fehler und am Ende steht …
can`t load /mnt/usb/if_rl.ko : File exists
Heisst das etwa, dass der Treiber schon vorhanden ist?! Ich werde das ganze Vorhaben nun auch beenden 🙁
Danke noch einmal!!!!!!
Sooo … nun habe ich es auf einem anderen Weg geschafft den Realtek-Treiber zu installieren:
Zuerst einmal das Verzeichnis /cf unmounten … umount /cf
dann sofort wieder mit Read-Write-Rechten mounten … mount -o rw /cf
Dann kann man die .ko-Datei vom USB-Stick oder mit WinSCP vom PC aus in das Verzeichnis /cf/boot/kernel kopieren!
.. jetzt nur noch den Eintrag if_rl_load=”YES” in die loader.conf eintragen und einen Neustart machen.
Et voila …. :-))))))
Hi
ich habe nun das gleiche Problem wie Markus, “file exists” (N4F version 9.1). Wollte einen Treiber für meine intel i217 laden, aber bleibe immer an dem Punkt hängen. Irgendwelche tips? Kann über WINscp leider nicht auf die box zugreifen da support für diese Netzwerkkarte erst in n4f version 9.2 kommen wird.
Dom: Ich bin kein FreeBSD Experte, aber “file exists” zeigt IMHO in diesem Kontext an, dass ein interferierender Treiber diesen Namens schon geladen wurde. Ich bin mir aber nicht 100%ig sicher. Schau mal unter “/cf/boot/kernel”:
ls /cf/boot/kernel
Findet sich da eine Datei gleichen Namens?
Du musst es genauso machen, sie Markus es dankenswerterweise hier in Kommentar 15 gepostet hat (Du brauchst kein WinScp”):
Wichtig: Du musst N4F als FULL-Installation aufgesetzt haben!
Eine etwas ausführlichere Anleitung (in englisch) habe ich unter http://www.kristijan.org/2010/11/freenas-realtek-network-card/ gefunden. Ich habe auch mein How-to’s diesbezüglich aktualisiert.
Bein einer embedded-Installation wird es etwas komplexer. Statt den Treiber nach “cf/boot/kernel” zu kopieren und in die “loader.conf” einzutragen, gehe nach meiner Anleitung von Punkt 10 bis Ende vor.Nach einiger Überlegung sehe ich bei einer Embedded-Installation IMHO keine Möglichkeit dieses Problem wirklich zu umgehen, da der interferierende Treiber bei jedem Neustart erneut geladen würde. Einziger Workaround ist IMHO eine Full-Installation.
@ Markus: Vielen Dank für deine konstruktive Rückmeldung. Ich weiß das sehr zu schätzen!
Da ich keine Nas4Free/FreeNAS-Installation mehr habe, kann ich vieles nicht mehr nachvollziehen. In meiner alten FreeNAS 6.4 lagen die Treiber noch unter “/boot/kernel”.
Pingback: Netzwerktreiber auf FreeNAS installieren | Hanis Sammelsurium
Pingback: Coach Training Procedure
Pingback: save my Marriage Advice