
Link in Netbeans’ JDialog
It is often desired to add a link on a JDialog. E.g. for the application homepage or for a service e-mail.
Unfortunately it is not as easy as expected because Java’s Swing does not have a link component or similar at all. But it is possible to configure a JLabel to behaves as a link.
This tutorial shows Java novices how to make a link from a Swing JLabel component in Netbeans using the GUI-Buider Matisse.
Creation of JDialog and JLabel
Create a new Java Application project:

Create a new JDialog: “File| New…”, in “Categories | Swing GUI Forms” choose JDialog Form. I called the JDialog class LinkDialog:

In the View Design drag the JLabel component from the panel Palette of the area Swing Controls and drop it on the grey area of JDialog:

Configure Jlabel
Set the focus to the JLabel by clicking on it on the design view or in the Navigator panel on the lower left side. Eight drag points appear around the component which show you that you succeeded.
Than go right to the panel Properties an click on the button with the same name. In the table look for the entry text and click on the small button with tree dots of the same line:

Enter the following HTML code in the appearing dialog box:

You can enter whatever you want instead of “Homepage”. This text appears in blue color and underlined. The appropriate URI will specified in the code later:

Add Events
In the design view go to the right to the panel Properties and click on the button Events. Scroll down to the entry mouseClicked. Click on the small triangle on the right end and choose the first and only entry:

Hereafter Netbeans jumps directly in the source view to the location where you have to implement the event listener. Enter the line:
openURI(uri);
in the listener. The red exclamation mark shows that you have to implement the specified method openURI().

We could implement the needed function right here but swapping out the function as a method gives you the opportunity to reuse it easily, e.g. for multiple Web-addresses or for an additional e-Mail address.
Now we implement the method openURI(). Put the code below in your class:
private static void openURI(URI uri) {
    if (Desktop.isDesktopSupported()) {
        try {
            Desktop.getDesktop().browse(uri);
        } catch (IOException e) { System.err.println(e.toString()); }
    } else {
        System.err.println("ERROR: 'Desktop.isDesktopSupported()' is 'FALSE'");
    }
}

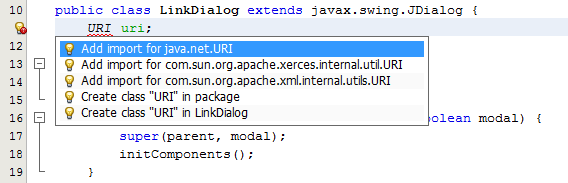
The yellow bulbs with the red exclamation marks on the left points you to missing imports of external classes. Click on the symbols and choose “Add import for […]”.
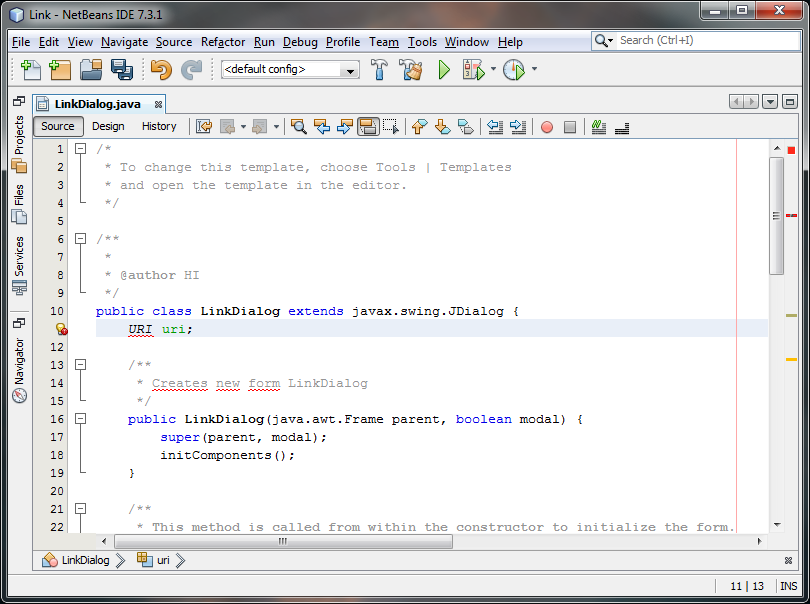
Additionally you have to specify the variable uri. That can be done as a class variable. Enter
URI uri;
after the main class:
public class LinkDialog extends javax.swing.JDialog {
and before the constructor
public LinkDialog(java.awt.Frame parent, boolean modal) {
Add the missing imports as before:
You have to specify the URI itself now. You can do it in the constructor between super() and initComponents
try {
    uri = new URI("https://netbeans.org/");
} catch (URISyntaxException ex) {
    System.err.println(ex.toString);
}

Instead of https://netbeans.org/ you can type any web address you like. If you want to use a e-mail add mailto: preceeding to your address, e.g. mailto:mymail@me.com.
Now you are ready. But ….
Improve userexperience
Users expect that the mouse cursor changes the shape when it is hovered above a link. To fulfill this expectation you have to go to the view Design and then to panel Properties:

Above, click on Events and scroll down to mouseEntered. Click on the triangle on the right and choose the entry. There is only one. Hereafter Netbeans jumps back to the source view and to the location of the currently created listener. Fill in the following code to change the shape of the mouse cursor to a hand with a stretched finger:
setCursor(Cursor.getPredefinedCursor(Cursor.HAND_CURSOR));
Of course the user expects that the mouse cursor reverses the shape after hovering, you have to go back to design view and add a new event mouseExited as you did before with mouseEntered. Just the code is slightly different:
setCursor(Cursor.getPredefinedCursor(Cursor.DEFAULT_CURSOR));

Run project
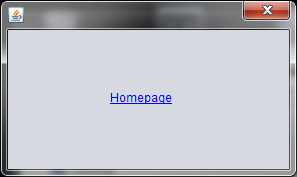
Now you are ready and you can start the project by pressing the key F6. Acknowledge the question of the main class if necessary:

And try out your self coded link in a JDialog:
Embed a JDialog in an existing project
Refer my tutorrial JDialog in Netbeans if you need help.
Download
You find here the complete example as a zipped Netbeans project.
- LinkDialog als Netbeans-Projekt (ZIP)
Import it by “Import Project | From ZIP …”.
Note: The LinkDialog class is located in the standard package. That is bad stile but it makes the tutorial a bit shorter. Furthermore I took over the given variable names of the components, as JLabel1. It is better to give them reasonable names as lbLink.
Netbeans Screenshot: CC0 - Public Domain (CC0)
Very efficiently written post. It will be valuable to anyone who usess it, as well as myself. Keep doing what you are doing i will definitely read more posts. dkedeegeggbk