
Field Report Photoshop Elements 8 (2/2) – Editor
 In the first part of this field report I reviewed the Organizer of Photoshop Elements 8. In this part I review the Editor of PSE 8. It is based on Photoshop CS4.
Adobe cropped some functions and tools of CS 4 in PSE’s Editor but added some new ones which were designed for beginners.
Whether these crops constrains my work flow or not shows the following report.
The Editor
The organizer fulfills the biggest part of my workflow, that I described in the first part. only #5 is left:
Photo processing
- RAW converting
- Stitching panoramas
- Correcting lens distortions and aberrant lines
- HDR-Editing
- Retouching, etc.
These tasks can be done in PSE’s Editor.
User interface
In fact PSE’s Organizer is able to do some basic photo processing tasks but they can not be controlled well. Moreover Organizer’s features can not handle RAW photo files non-destructively.
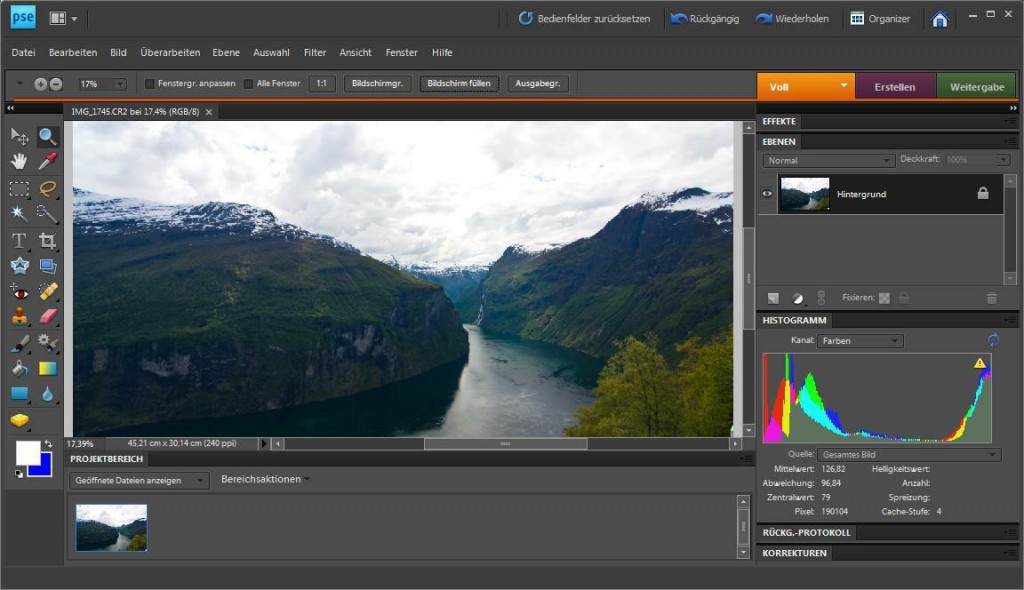
The Editor’s user interface (UI) looks a little bit different to normal Windows programs. The color of the UI is dark grey as many other applications in this field. It has a menu bar at the top, a toolbar at the left and a tool dependent option bar below the menu. At the right side there is a multi function sidebar located. It contains different palettes, as histogram, layer, etc. At the bottom you find a project bar where all your opened files are displayed as thumbnails.
If you click on the maximize button of a photo window the whole screen and all UI components will be covered by it. This could be handy if you use two screens, where you have the photo on one and the UI on the other screen. But in my opinion it is less useful on one screen computers. However to maximize the photo window inside the Editor window, move the photo window to the top of the working area (orange line below the option tool bar). A blue frame will appear and then release the window. As the consequence the photo window is maximized inside the Editor window only (see screenshot above). If you get used to it you may work well with this special behavior.
If you have more than one file opened it is easy to arrange them with the arrange button (right to the blueish PSE icon at the top). The sidebar on the right is shrinkable to offer more space for the photos.
Tip: On almost all filter dialogs you can change the CANCEL to a BACK button by pressing the ALT key. Than it is easy to undo filter actions when the dialog is still opened. This function is very handy and I use it a lot.
Now I would like to direct the attention to the sidebar on the right. On the yellow tab you can change the editor mode:
- Full Edit: Maximum control over the editing process
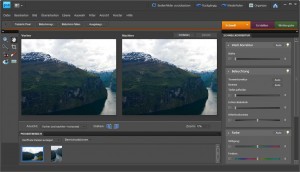
- Quick Edit: Sliders for a quick and easy fix
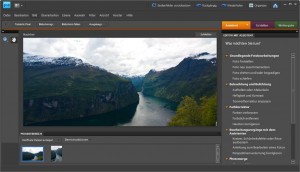
- Guided Edit: Wizards for the most common edits. Very useful for unexperienced users.
The tabs “Create” and “Share” of the sidebar are exactly the same as on the Organizer and have been described in the first part of this field report.
Limitations of Photoshop Elements 8 in comparison to Photoshop CS 4
There are a lot of functions missing in PSE 8 if you know CS 4:
- Adjustments: Color Balance, Match Color
- Layer Masks, Layer Comps, and Quick Mask mode
- Some adjustment layers (curves, color balance, selective color, channel mixer)
- CMYK and LAB color modes
- Combine multiple exposures to create high dynamic range (HDR) images
- Channels Palette
- Recording custom Actions (for batch processing)
- Smart Objects, Smart Guides
- Lens Blur Filter
- Vanishing Point Tool
- Pen tool and paths palette
- Editing History Log
- Text on a path, advanced text formatting
- Advanced Layer Style manipulation
- Advanced Color Management
- Advanced web features such as rollovers and slicing
- Customizable tool presets, keyboard shortcuts, menus and workspace
(Source: Digicamhelp)
The experienced user has to decide if he or she can live with this limitations.
However PSE8’s Editor is based on CS 4 and contains most of its functions but many are deactivated internally. Some Plugins “activate” resp. add some missing features. Visit the webpages of Elements+ and SmartCurve for details.
RAW photo developing
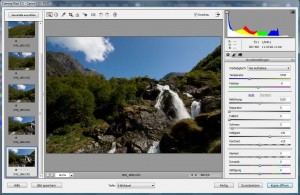
To edit a RAW file non-destructively you have to load it into a RAW converter. PSE 8 contains ACR 5.5 (Adobe Camera Raw). In comparison to ACR of Photoshop CS Adobe crops some features in ACR for PSE 8.
But ACR is able to load and process multiple files at the same time. This is useful if you would like to process photos of a panorama session similarly before stiching.
Stitching panoramas
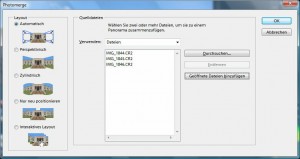
One of the Photomerge® functions of PSE 8 is panorama stiching. You have very less control over the stitching process but the results are always pretty fine. Even my hand-taken photos were stitched properly.
For me the main advantage of the built-in stitcher is the possibility to create panoramas from RAW files directly without converting them into JPEGs or other formats. This is stitching the easy way.
Correcting lens distortions and aberrant lines
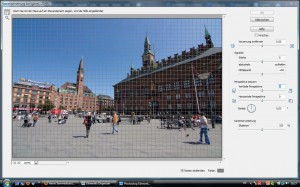
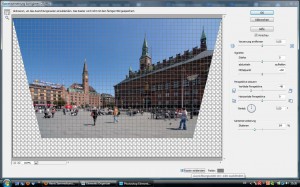
I often take photos with short focal length. To correct lens distortions and aberrant lines PSE 8 offers a comfortable filter. You find it in the filters menu.
A really nice filter. I have used it quite often.
High Dynamic Range images (HDR)
Many photo scenes have a higher dynamic range as the sensors of digital cameras – even of DSLRs – are able to handle. If you took exposure bracketings the Photomerge function “Exposure” create a HDR image almost automatically. Till now I have not tested this function.
More Photomerge® functions
The Photomerge family offers a lot more functions than the already described ones.
Photomerge Faces combines multiple facial features to create one composite face.
Photomerge Scene Cleaner creates the perfect scenic photo from multiple photos. You can eliminate unwanted elements like tourists that inadvertently wandered into the scenery. For best results, the multiple images used with Photomerge Scene Cleaner should be of the same scene taken from the same angle.
Photomerge Group Shot creates the perfect group photo from multiple photos. For best results, the multiple images should be from the same photo session.
I have not used one of this functions till now except scene cleaner. It worked pretty well on one of my photos.
Not a Photomerge function but also interesting is the “Recompose Tool“. It facilitates intelligent resizing of photos without changing important visual content such as people, buildings, animals, and so on. Normal scaling affects all pixels uniformly when resizing an image. Recompose affects pixels in areas that don’t have important visual content. Recompose enables you to upscale or downscale images to improve a composition, fit a layout, or change the orientation.
Intermediate conclusion
The Editor of Photoshop Elements 8 fulfills all my requirements of photo editing. Even for ambitious users Plugins extend the Editor with a lot of functions from Photoshop CS 4. Some functions of PSE 8 are unique, e.g. the Photomerge® Scene Cleaner. Even for Correcting lens distortions and aberrant lines PSE supports you doing the job. If you want to stitch panoramas or create HDR images PSE 8 has all tools built-in. The integrated RAW converter ACR completes the positive image of the PSE 8 Editor.
On my Windows Vista box (Core-2-Duo 2,4 GHz, 4 GB RAM) the Editor runs pretty fast and the usage was straight forward – even though I had to get used to the unusual window management first. Sometimes it takes a while from jumping from the Organizer to the Editor and vice versa even if both applications are already started.
In my opinion you are not able to buy a better photo editing tool for this price which is applicable for beginners and advanced users as well. Nevertheless professional photographers may prefer Photoshop CS.
I rate the Editor of PSE 8 with 4 from 5 stars.
Final conclusion
First of all Photoshop Elements 8 (Organizer and Editor) fulfills all my requirements of my work flow. The offered functions in the Organizer and Editor are thought-out and straight forward. The beginner was also considered as the advanced. PSE 8 handles RAW files as easy as JPEGs. Focused on hobby photographers I rate PSE 8’s functional range and ease of use with full 5 stars.
But the consumption of resources are not low and in some less situations you have to wait where you do not expected. Storing photos on network drives is not recommended because PSE 8 becomes noticeably slower. Especially if you organize and edit RAW files. Sharing of catalogs in a network is almost impossible. Every client has to manage their own catalog. On systems where catalogs and photos stored on a network share PSE 8 becomes incredibly slow in many functions.
Processing many photos is not recommended. It takes to much time to load every single photo in the RAW converter and then in the Editor. A work flow tool as e.g. “Adobe Lightroom” is a more productive alternative. But if you have to process less then 50 photos per session your work flow is not bad.
Adobe provides a good online documentation on the Adobe-Website. You can also download a PDF file for offline reading there. Furthermore a lot of videos are available to get started easily. All help files and documentation are accessible from the help menu.
My final rating of PSE 8 is 4 from 5 stars. If you are a hobby photographer and if you work completely local and if you do not use old or weak hardware or to many photos per session I recommend PSE 8 for organizing and editing photos. But I also recommend to download the demo version on Adobe’s website before purchasing.
Titleimage: CC BY 2.0 - Reinis Traidas @Flickr
Hallo Hani,
danke für den Erfahrungsbericht, der mir auch für PSE9 weitergeholfen hat.
Dennoch eine Frage:
“Wenn ich eine nef.-datei im Editor aufrufe, startet der raw-converter. Änderungen im raw-converter werden, nachdem auf fertig geklickt wurde, übernommen und auch im Organizer angezeigt. Sofern aber eine weitere Bearbeitung im Editor von PSE stattfindet und diese auch als Dateiformat …._bearbeitet1.nef abgespeichert wird, kann der Organizer diese im Versionssatz nicht anzeigen.
???? Mache ich da etwas falsch?
Danke für eine Antwort
Gruß
Gunter
Hallo Gunter,
Ja, das ist so eine Sache mit dem RAW-Format. Wenn du eine RAW-Datei (z.B. NEF) im RAW-Editor von PSE, Adobe Camera RAW (ACR), bearbeitest, wird NICHT die RAW-Datei verändert!! Die Bearbeitungs- bzw. “Entwicklung”sschritte werden in eine sogenannte Sidecardatei (Dateiname des Fotos mit der Endung XMP) geschrieben. Beim erneuten Aufrufen der NEF-Datei in ACR wird die unbearbeitete NEF-Originaldatei und erst dann die Bearbeitungsschritte aus der XMP-Sidecar-Datei geladen und ausgeführt. Man nennt dies “Nicht-destruktive Bearbeitung”. Du kannst den RAW-Editor als digitale Dunkelkammer begreifen, in der du Positive entwickelst. Die Negative (RAW-Dateien) bleiben wie bei der analogen chemischen Entwicklung unverändert erhalten. RAW-Dateien werden also NIE direkt verändert!
Leider kann man nicht alle Änderungen im ACR machen (wenn auch viele). Lädst du deine RAW-Datei aus ACR in PSEs Editor, dann werden die Entwicklungsschritte des RAW-Editors übernommen, wie du richtig erkannt hast. Im PSE-Editor kannst du dann auf Pixelebene deine Fotos bearbeiten (Destruktive Bearbeitung). Dabei werden die Änderung am Bild unwiderruflich durchgeführt. Das Bild wird also wirklich verändert. Es werden hier KEINE Bearbeitungsschritte in die XMP-Datei geschrieben!
Und jetzt zu deinem Problem: Damit du dennoch dein im PSE-Editor bearbeitetes Foto speichern kannst, wähle ein sogenanntes Rasterbildformat, auch Bitmapformat genannt. Dazu gehören JPG, TIFF, PSD, etc. Speichere nicht mit der Endung NEF. Das funktioniert sowieso nicht, da man RAW-Dateien nicht direkt bearbeiten/speichern kann.
Ich empfehle dir das Adobe-eigene Format PSD oder das herstellerunabhängige TIFF-Format. In diesen Formaten werden die Bilddaten NICHT-verlustbehaftet komprimiert. Keine Bildinfos gehen verloren. Ideal für spätere Nachbearbeitungen.
Das bekannte JPG-Format empfehle ich lediglich als EXPORT-Format (Export-Funktion von PSE-Organizer), wenn du deine Bilder präsentieren/versenden willst. Das JPG-Format verwendet eine verlustbehaftete Komprimierung und eignet sich nicht für spätere (Nach-)Bearbeitungen, da die Bildqualität nach jedem Speichern durch die verlustbehaftete Komprimierung immer schlechter wird. Aber die JPG-Komprimierung erzeugt sehr kleine Dateigrößen. Ideal fürs Web oder E-Mail.
Das Bitmap-Bild wird jetzt auch im Versionssatz des RAW-Bildes angezeigt, wenn die entsprechende Checkbox im Speichern-Dialog aktiv ist.
Hi Hani,
ich danke Dir für Deine schnelle Antwort.
…und weiterhin viel Erfolg mit deiner Webseite
Gruß
Gunter
When you have imported picasa photos, random photo transition will automatically
applied to them. If you want to perform standard
edits, then you should try one of the free online programs like Picnik or Photobucket.
Log into Facebook on your smartphone utilizing either the Facebook app or
an internet browser app.